Site
Menu
 |
|
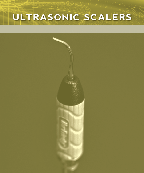
Ultrasonic Scalers 90-DAYS WARRANTY ON PARTS AND LABOR There’s no need to box up and ship out your ultrasonic scaler. We’ll come pick it up for free. And we know you need it repaired quickly, so we stock most parts for fast turnaround. We also use genuine Dentsply parts. With our convenient personal service and hassle-free warranty, you’ll be glad you chose Hayes.
WE SPECIALIZE IN
• CAVITRON® • AUTOSCALER™ • COLETÉNE/WHALEDENT • BIOSONIC • TPC • DELMARVA • VETROSON • TONY RISO • ASK ABOUT OTHER MODELS!
Insert Cleaning
• Rinse inserts thoroughly to remove debris
• Do not expose ultrasonic inserts to corrosive chemicals such as chlorides, sulfates, and surface disinfectants
• Do not expose resin or silicone handles to phenols
• If ultrasonic cleaning is desired, fully immerse in a mild ultrasonic cleaning solution like Hu-Friedy’s Daily Clean or Enzymax® for 7-10 minutes, or 15-20 minutes if the insert is in a cassette
• Rinse inserts thoroughly after ultrasonic cleaning (Approx. 30-60 seconds for loose inserts and 1 to 1.5 minutes per cassette)
• Dry ultrasonic inserts completely
Insert Sterilization
• Sterilize ultrasonic inserts in a cassette (i.e. IMS™ instrument cassette) or paper pouch in a steam autoclave
• Placing pouches in the vertical position inside the sterilization chamber will eliminate weight bearing down on the inserts
• Chemical vapor sterilization is not acceptable for SWIVEL™ or SWIVEL™ Direct Flow™ inserts (excluding SWIVEL™ inserts)
• Rapid heat transfer sterilization (dry heat) and cold liquid disinfectant/sterilization is not recommended as O-rings may dry out and crack
• Resin and silicone handles will distort if temperature spikes above 350ºF/176ºC
• Allow ultrasonic inserts to dry completely after sterilization cycle S Proper Handling and Set-Up Procedures
• Run water through the handpiece for at least two minutes at start up and for 30 seconds between uses before seating the ultrasonic insert. This increases the life of the o-ring, prevents the ultrasonic insert from heating up and prevents water flow after release of foot control
• Properly seat the ultrasonic insert
• Fill the handpiece with water
• Lubricate the o-ring with water
• Carefully twist the insert until it snaps into place
• For SWIVEL inserts, activate the foot control and rotate insert 2-3 times
• Begin with the power setting on low and adjust as needed
• Avoid high power setting for thinner tips
• High power is usually not necessary
• High power may make the patient uncomfortable
• High power may stress the insert tip resulting in possible tip breakage Caution: For optimal performance, patient comfort and increased instrument life, use thinner inserts on low to medium (1/2 power) setting only.
• Confirm adequate water flow to the handpiece. This prevents the ultrasonic insert from heating up and prevents the stack from becoming flexible, resulting in loss of efficiency
• Visually inspect ultrasonic insert
• Replace worn or bent insert
• Do not bend or modify the insert tip
• Check stack for flexibility, warping or separation of wafers
• Replace o-rings when dried or cracked
Worn Inserts
Scaling efficiency can significantly diminish with worn insert tips. Inferior performance and poor water delivery can result from damaged, bent or altered tips. For optimal scaling efficiency, we recommend checking inserts monthly for signs of wear. 1mm loss can result in a 25% loss of efficiency and 2mm loss can result in 50% efficiency loss.
Removing Inserts from Autoclave Bags
When you remove your ultrasonic insert from the autoclave bag, do not open the bag by pushing the insert through the paper or plastic. This will bend the stacks of the insert without you even knowing it. Damaged stacks reduce power, or eventually stop the insert from working
| ||
© Copyright Hayes Handpiece Duluth, 2012 All Rights Reserved.


